We are quickly approaching one of my favorite times of the year FALL. The weather is beautiful and outdoor entertaining is a must so I have been on a mad dash to finish our outdoor space.
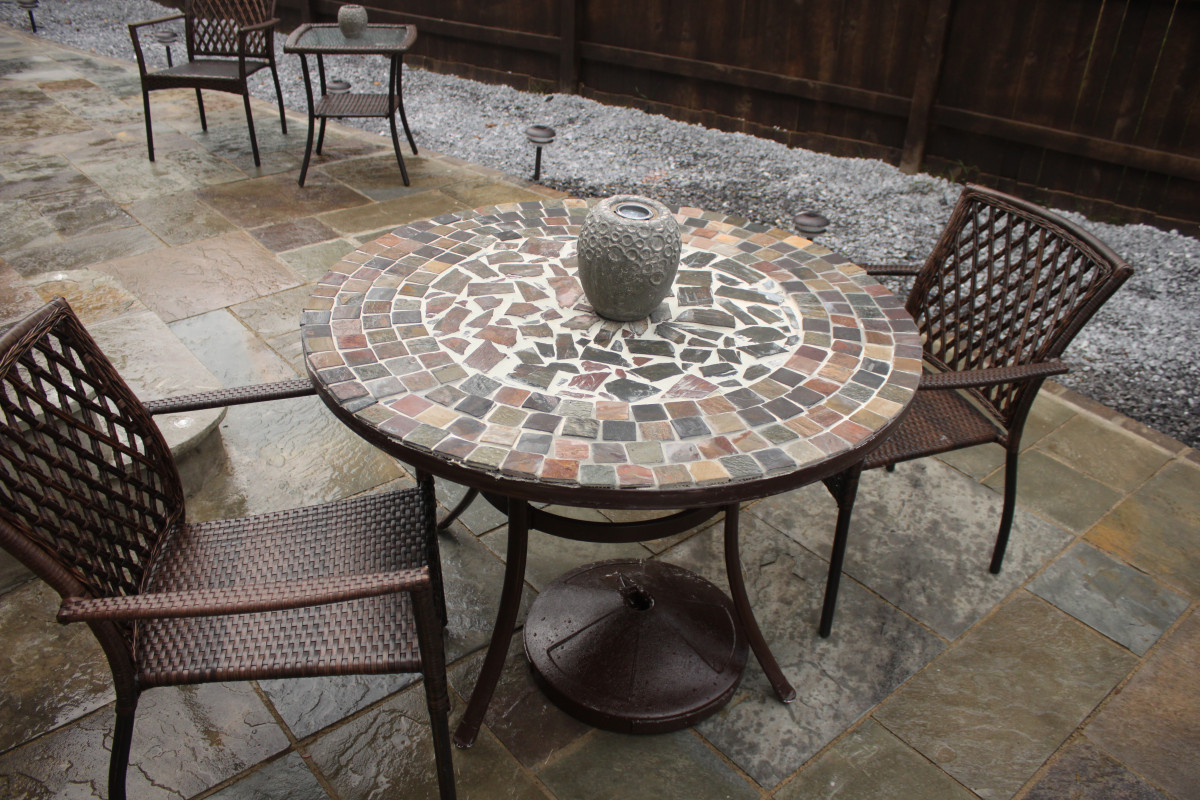
I’ve been in crazy search mode for a stone table and have come up empty handed. Not because they don’t exsist, but simply because I refuse to pay an arm and a leg for a table that’s going to sit on our patio. I came across many I absolutely loved like this one and this one but at an average of $3,000 it just wasn’t going to happen. So I did the next best thing, afterall I have had a little tile experience seen here and here and DIY it was, and at only $125.00, I think this was a no brainer.


I’ve been in crazy search mode for a stone table and have come up empty handed. Not because they don’t exsist, but simply because I refuse to pay an arm and a leg for a table that’s going to sit on our patio. I came across many I absolutely loved like this one and this one but at an average of $3,000 it just wasn’t going to happen. So I did the next best thing, afterall I have had a little tile experience seen here and here and DIY it was, and at only $125.00, I think this was a no brainer.
Picked up this 42″ metal table from Home Depot, originally $163.00 marked down to $50.00
If this table wasn’t on sale I probably would have gone to a thrift store to find one. This time of year is the best for finding outdoor home good sales.
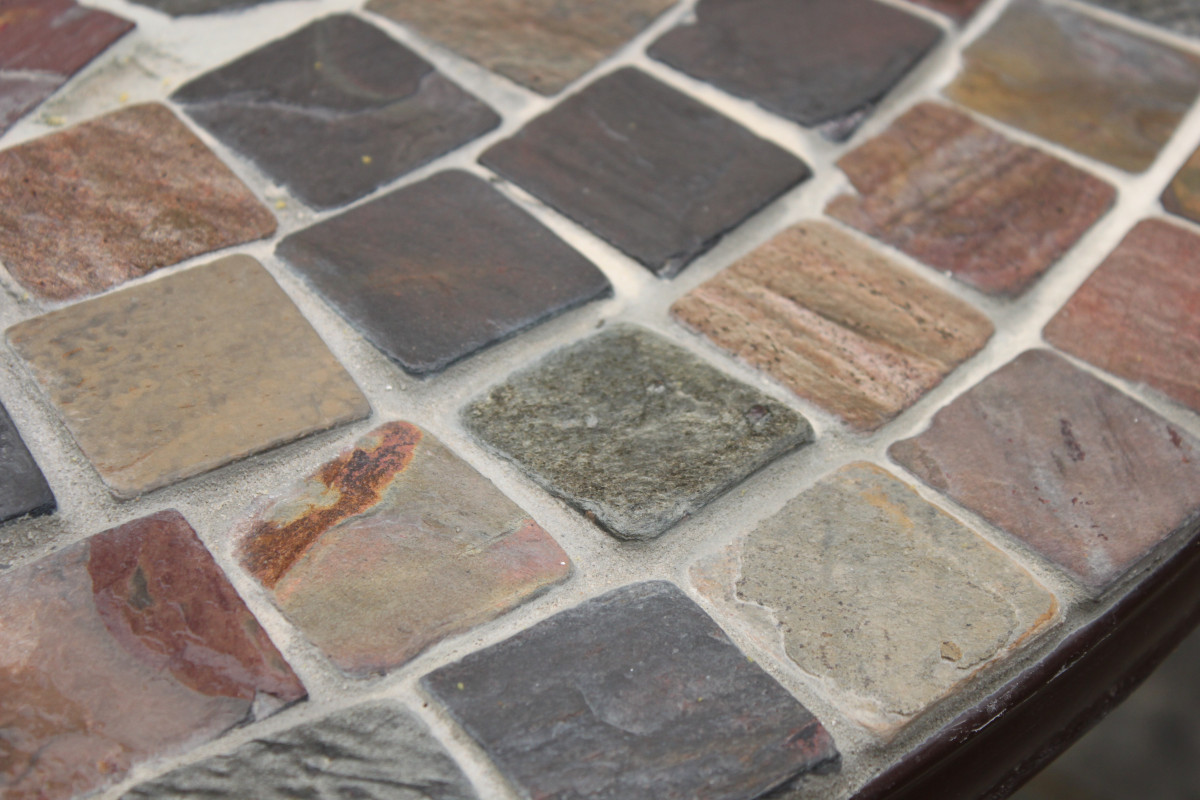
Grabbed this tile setting mat, 2 of these 12×12 slates and 6 pkgs of these 2×2″ tiles. This spray paint and any sanded grout will work I used this one which was on clearance for a whopping $1.00 due to the tube being dented.
Step 1/2 Spray paint the table and allow it to dry completely. Apply the tile setting mat according to packaging instructions.

Step 3 Prior to removing the top glue cover, arrange the tile to make sure you like the fit prior to glueing down.

Step 4 Take a hammer to the 2 12×12 slates to create small pieces.

Step 5 Arrange the tiles in a row of 4 and the large chunks in the center.

Step 6 Spread the grout working in small sections.

Step 7 Using a wet sponge, wipe the grout completely off the surface of the stones, section by section.

 |
| 10 days after the tile has cured, apply a grout haze remover and a sealer. |